Clay
Slideshow
Important Info & Vocabulary
Tools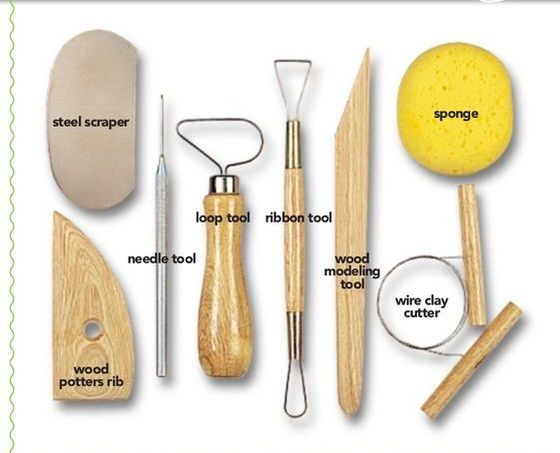
|
Hand Building TechniquesCoil: long, thin rope of clay
Pinch: pressing with fingers to form clay. A pinch pot is a common use of this technique. Slab: thin, flat area of clay made by pressing or rolling. Slabs can be used for decoration or to build forms. |
Processes
Score and Slip: Joining sections of clay together by roughening the surfaces and applying water or slip, then pressing to join.
Wedge: Processing clay to the plastic stage by kneading to create a smooth, even texture and remove air bubbles.
Wedge: Processing clay to the plastic stage by kneading to create a smooth, even texture and remove air bubbles.
Stages of Clay
Slip: wet, liquid clay used for attaching.
Plastic: movable, pliable clay that is easy to shape. Plastic clay will not hold some shapes.
Leather Hard: clay with less moisture than the plastic stage. Leather hard clay holds it's shape.
Bone Dry: all moisture is evaporated - ready to be fired in the kiln.
Plastic: movable, pliable clay that is easy to shape. Plastic clay will not hold some shapes.
Leather Hard: clay with less moisture than the plastic stage. Leather hard clay holds it's shape.
Bone Dry: all moisture is evaporated - ready to be fired in the kiln.
Stages of working with clay
Planning: Develop ideas and learn new skills.
Making: Create with clay. Store in a labeled bag to retain moisture as needed on the "clay in process" area.
Drying: Clay has to be bone dry to be fired. Put clay in the "ready to be fired" area.
Finishing: Clay can be painted with underglaze when it's at the leather hard stage, and glazed or painted after it's been fired.
Challenge 1: Make a pinch pot
|
1. Gather materials (you will have to share tools): a palm sized cube of clay, a placemat, a rib a spray bottle and tools to decorate like stamps, loop tool or extra clay.
2. Watch the video below, starting at 1:50 and follow along. 3. Add decoration to your pinch pot. 4. If you want to keep it, write your name on the bottom with a needle tool and place on the to be fired shelf. 5. Clean up. Recycle any clay you don't want, put all tools away and make sure your area is clean. |
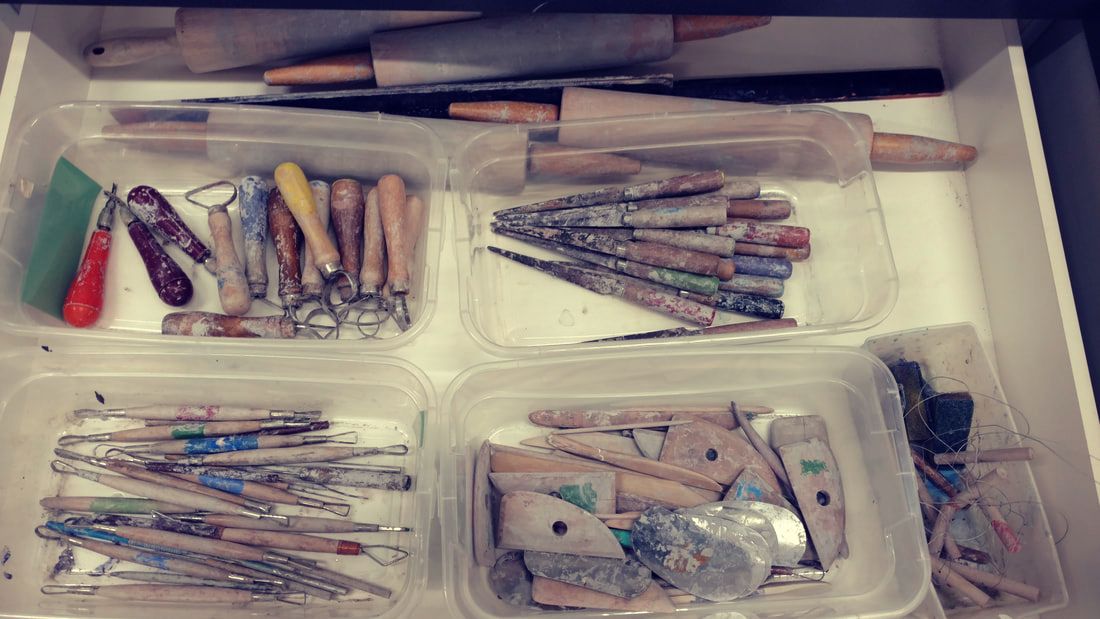
The tool drawer in the clay center.
|
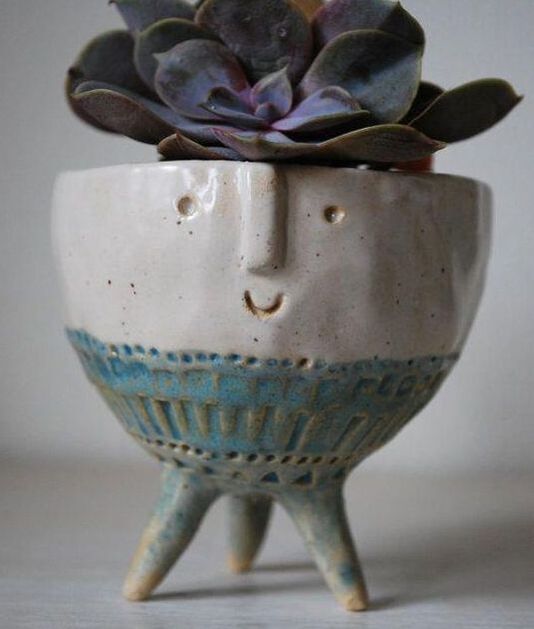
Glazed pinch pot with pressed texture and tripod legs.
|
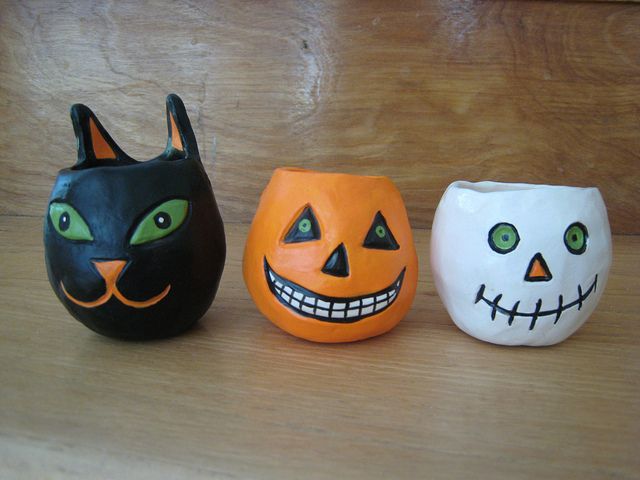
Painted halloween themed pinch pots with added details.
You can make so many things with pinch pots! You can score and slip to add, carve or press to take away and glaze or paint when they are ready. Research for ideas.
|

Compound pinch pots.
|